Today's tip involves recycling. Whenever you pop open those packages that have clear acetate windows that allow you to see your product through the packaging or is anywhere on the packaging- SAVE IT!
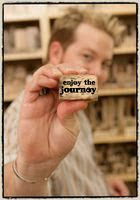
You can use it to stamp your images to help you figure out placement on your projects. They can serve as a spacer, template or guide to help you get your positioning just right.
All you have to do is stamp your image on the clear surface. Then set it on your card, scrap layout, or project to see where you think your stamped image might look best. This allows you to try it out in different areas of your project before committing to placement. Once you have placement figured out you can then stamp your image without reservation of placement.
Go ahead & give it a try. I am sure you will find it helpful.
Happy Crafting!
Monday, November 30, 2009
Sunday, November 29, 2009
THE LATEST HOT PAPERCRAFTING PRODUCTS VIDEO
HEY CRAFTERS~JUST WANTED TO SHARE THIS VIDEO OF A FEW OF THE HOTTEST PRODUCTS OUT THERE FOR CRAFTING.
THEY ALSO CORROBORATE MY PREVIOUS POST RE: SCRAPBOOKSTEALS.COM.
Enjoy!
THEY ALSO CORROBORATE MY PREVIOUS POST RE: SCRAPBOOKSTEALS.COM.
Enjoy!
SCRAPBOOK STEALS
Hey guys~ I know that Black Friday shopping probably yielded some amazing deals for you but I wanted to let you in on a little something I found online.
It is the site: www.scrapbooksteals.com.
Check it out!
You are likely to find some of the latest papercrafting products at some really great prices without having to step out of your home.
Keep Crafting!
It is the site: www.scrapbooksteals.com.
Check it out!
You are likely to find some of the latest papercrafting products at some really great prices without having to step out of your home.
Keep Crafting!
Hello!
Hey there everyone~ hope your Thanksgiving holiday was wonderful.
I had the opportunity to see family & it was terrific.
I am truly blessed beyond measure.
The only thing that could have made it better was if my husband were home to share it with us.
He is currently deployed so obviously Thanksgiving at home was not possible.
That being said, I wanted to remind you all to please, please, please...
Remember the soldiers!
They so want to keep in touch with family and loved ones.
Help them do that by going to: operationwritehome.org.
There you will see a tab welcoming new card makers, go ahead click on it. Find out how your card making talents can be put to great use.
In the spirit of thankfulness I wanted to express my gratitude to those who stop by my blog.
I encourage you to share your comments and appreciate your feedback.
In the upcoming weeks I plan on having a giveaway so stay tuned for the details.
Blessings to you all.
Happy Crafting!
Wednesday, November 25, 2009
VIDEO ON HOW TO MAKE A STEP CARD- THIS LADY IS VERY TALENTED!
Hello everyone!
I viewed this great video on how to make a step card. The card is just adorable & would be fun to give this holiday season. This crafter is great at instructing. She is talented and her warm spirit leaps off her craft videos.
I viewed this great video on how to make a step card. The card is just adorable & would be fun to give this holiday season. This crafter is great at instructing. She is talented and her warm spirit leaps off her craft videos.
Monday, November 23, 2009
CRAFTING TIP OF THE WEEK (#13) WRITTEN TUTORIAL -MAKING COMPUTER TYPE WHITE IN WORD
This week's tip is more of a tutorial on how to make your computer type white in Microsoft Word.
1-Open a blank Word document, then go to File, Page Setup and choose landscape as your orientation.
2-Go to Insert, Text Box and click inside your document. Drag the corners until the text box is roughly the size you want.
3-Double Click the edge of the text box to bring up the Format Text Box menu. On the Colors & Lines tab, select a Fill Color. UnderLine, choose NO LINE. Click OK.
4-Create a 2nd text box(specify NO FILL/NO LINE), and drag it on top of your 1st text box. Type a character in the box and select a font & size.
5-Highlight the character, go to FORMAT, FONT, FONT COLOR, and choose the same color as your background box.
6- Highlight the character again, go to FONT COLOR and selct MORE COLORS. Click the CUSTOM TAB and drag the slider bar so the character is a slightly lighter shade than the background bar.
7-Create a third text box (specify NO FILL/NO LINE)and drag it on top of both existing text boxes. Type in your title, and select a font & size. Hightlight words, go to FONT Color and choose white.
Happy Crafting!
Sunday, November 22, 2009
Subscribe to:
Posts (Atom)
