*** GIVEAWAY POST FOR 500 OR MORE FOLLOWERS IS DATED SEPTEMBER 1ST, 2011***

Please leave your comment under the GIVEAWAY post for consideration in the drawing. Once I reach 500 followers I will select a winner! Thank you kindly.

Monday, March 4, 2013

Crafting Tip of the Week#170- "Uh, Oh, Uh, Oh- Stuck like Glue"...


You & me baby we're stuck like glue... or maybe not us so much but  your ink spray  nozzles.

Has this ever happened to you crafters?

Where you go to spray or spritz your Glimmer Mists, Lindy Stamp Gang Fabios or Perfect Pearls sprays and the atomizers are "STUCK". They won't function for ya. Nothing's spraying out of the nozzle. The whole is covered in goop or something is blocking it from releasing your color sprays.

That's usually an indication that there is caked on ink residue that is blocking the atomizer from actually performing its' function. It's gummed up and not allowing the ink to make its' way out of the hole & onto your project.

So what do you do?

Today's tip is what I do.

I...
- unscrew the caps
- throw them into BOILING water!  When the water is boiling remove from your stove top or the microwave then throw your caps in
- let them sit in the boiling water for approximately 5 minutes or until the water cools to the touch allowing the caps to soak

-tap off any excess water & squeeze the pump several times to get the atomizer function going again as if you were spritzing your project with ink
-use a paper towel or dish cloth to scrub off any visible residue from the nozzle & cap

The hot, BOILING water actually helps break down the residue and releases the gunk from the atomizer completely, clearing way for your inks to spray out as they should.


This works for me & I find that I don't have to use any expensive cleaners to get the job done. Also, it salvages my spray inks and keeps my atomizers in functioning order.

Let me know if you try it & how it works for you.

I appreciate your visit & hope you were able to glean something helpful.

Friday, March 1, 2013

Fabulous Friday Find- The Graphic 45 French Country Collectioln


Hello!

Today's find is the Graphic 45 F'rench Country Collection which was newly released at winter CHA 2013. 

Look at how pretty the line is below:


Truly delightful!


Hope you enjoyed this week's find of fabulosity!

Have a wonderful weekend.

Tuesday, February 26, 2013

Tool Time Tuesday- The AdvantEdge Punch


Hey Crafty Friends!

Today's tool is brought to us by Fiskars & it's the newly debuted AdvantEdge Border Punch Tool.

Check it out in action: 


Doesn't it look cool? 

It is available at Scrapbook.com & Joann's stores. 

It's so fun to see all the cool tools out there. I may not own them all but it is interesting to me to see what they continue to bring to market. 

I'll be back with another tool next Tuesday...stay tuned. 


Monday, February 25, 2013

Crafting Tip of the Week#169- Got Left-overs?

Left over alphas that is my crafty friends.

Do you find yourself having extra letters in your stash of alphas?
Why not put them to use by monogramming?


I love the idea of personalizing my crafts especially those I make for gift giving, how about you?

Why not combine those two aspects of our craft world and use extra, left over letters to monogram.

You can monogram scrapbook layouts, mini albums, shadow boxes but you can also take cute trinkets, baskets, vases, potting plants, frames, plates and other household items and doctor them up with your left overs.

Check out some of mine below:

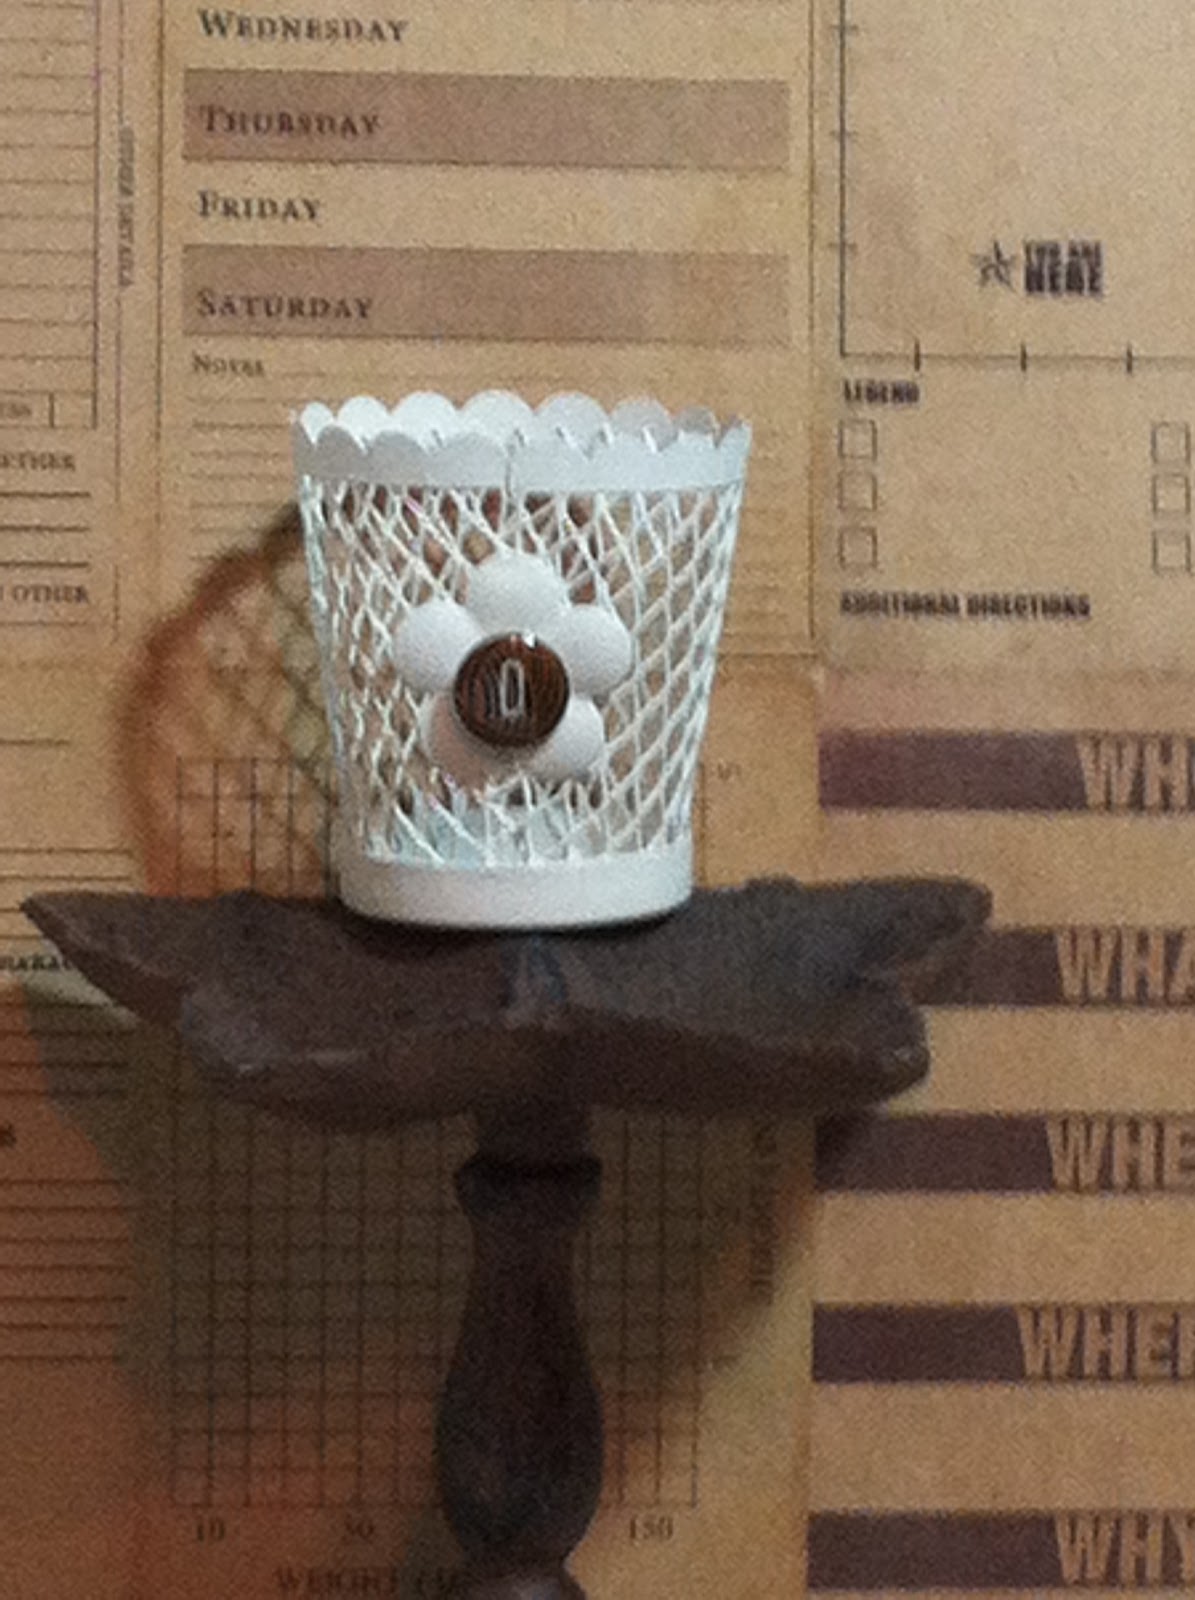
I made napkin rings which I monogrammed with the letter of each dinner guest using these black & white chipboard letters I had left over from a set of letters.


Then I monogrammed a little votive holder which I am actually using to place a bunch of chalk inside of to gift along with a desk top chalkboard...the recipient's name is Olivia. I used the  "o" as a center for  the flower. 


Lastly, I monogrammed a little notepad for my youngest daughter. I used some left over plastic, Heidi Swapp letters from an old collection I had hanging around.


I love monogramming!

Now go through your collection of alphabets & see what great things you can personalize &  monogram.

I feel like monograms are so personal and add such a special touch to anything. They really say, "hey...I made this with you in mind"! So next time you have a gift to get, think about personalizing it with your left over letters.

Letters come in all sizes, shapes, dimensions and even if you just die cut some out of plain ol' cardstock you could always jazz them up & put Glossy Accents on them to make them stand out.

The name of the game here is...try using your left over letters in clever ways. Monogramming is one of my go to ways.

How about you? Got any ideas for left over letters?

Hope this one sparks many!

Take care & have a great day.

Friday, February 22, 2013

Fabulous Friday Find- The YES PLEASE Collection


Hello There Crafters!

Thanks for stopping by today. 

Today's showcase is by Amy Tangerine & also debuted at the Winter CHA 2013. 
It's her YES PLEASE Collection which is filled with so many wonderful surprises and also some staple 
pieces that we have come to know & love from American Crafts. 

Take a look at the video brought to you by Noell Hyman of Paperclipping.com:


Isn't the collection adorable?
Oh the things we can make with this collection!

Enjoy your weekend.


Tuesday, February 19, 2013

Tool Time Tuesday- The Zutter Bow-It-All


Hi Crafters!

Today's tool is brought to us by Zutter-it's the Bow-It-All!

It's a tool that helps you make all kinds & shapes of bows. For those of us who love bows but don't love making them, this tool's for you. 
Bows are great for use in crafting projects but how about for gift wrapping & making pretty girl hair accessories? 


Check out this video shared by Crafttestdummies:


Isn't it a clever tool?

Hope you enjoyed & will tune in again. 


Monday, February 18, 2013

Crafting Tip of the Week#168- Measuring Up!


Good Monday to you all!

Today I thought I would share a little info about measurements on your paper cutters & trimmers. 

I for one struggled in the early days with getting measurements correct when using trimmers. 

I never really had anyone show me how to use one and I could not recall for the life of me all that I learned in school (way back when) with regard to measurements. 

So I set off on a mission to learn. There are some good videos out there. 

But I wanted to have a point of reference that I could keep with me on my workspace so I took an inexpensive measuring tape ruler & basically doctored it up to help me keep my measuring skills in check.
I simply wrote the measurements using a fine point sharpie above the actual tic mark and use it as a reference point. 

I then took it over to my paper trimmer and transferred the measurements accordingly. 

I did not use metric measurements as I am most comfortable with the old school inches. 

Just keep in mind a couple of things. There are 2 kinds of measurement increments. The 1/8th" & the 1/16th". 

I used the 1/16th inch.
So my measurements read as follows: 

1", 1 1/16", 1 1/8", 1 3/16", 1 1/4", 1 5/16", 1 3/8", 1 7/16", 1 1/2", 1 9/16", 1 5/8", 1 11/16", 1 3/4", 
1 13/16", 1 7/8", 1 15/16", 2", etc...

There...that takes you from one inch to 2 inches in one sixteenth increments. 

I found this older video by Angie Kennedy of the Chic'nScratch blog. She does such a great job of explaining how to use your paper trimmer and measuring. She specifically uses a Fiskars Trimmer. She also skips some of my measurements above but it all ends up being relative.

 Check out her video below:


Hope you found this insightful. I know that many of you avid crafters probably know how to use paper trimmers & have the measurement system figured out but for some reason I felt compelled to share this info.

I hope this helps someone out there.
Have a great week.