Hello Everyone!
In my attempt to bring you crafting & creating news you can use I discovered a fabulous find.
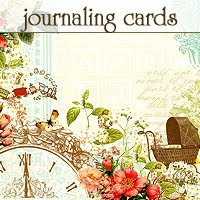
A very innovative girl created a downloadable pdf of "calling cards" that you can simply fill in & print to use.
It is quite generous of her to allow this for free. There are 8 designs & they are beautiful! See for yourself below:
WHAT IN THE WORLD WOULD YOU NEED A CALLING CARD FOR YOU ASK?
-For those who craft professionally these make for a great way to get your contact info to people without too much personal information.
-For crafters who like to submit their work for contests & magazine challenges, you can attach these calling cards to your work for identification purposes.
-For those who craft & teach and attend workshops, crops, shows and conventions you can hand them out to other crafters, business owners and potential customers.
To get yours, head on over to http://www.cottage-industrialist.com, read her post and you will find the directions on how to customize & print these out for yourself.
Don't forget to show her some love & give a big thanks.
Thank you Cameron!
Enjoy this fabulous Friday find.
Have a great weekend.
Friday, February 26, 2010
Tuesday, February 23, 2010
"TOOL TIME TUESDAY" THE SCOR BUDDY
THE SCOR-BUDDY
Mama Scor-Pal has recently delivered her newest addition to the family which was released at Winter CHA. It is the SCOR-Buddy!
Just like the larger version, the Scor-Buddy has deep grooves which allow you to run your Scor-Tool down the line without slipping out of the groove. It allows for crisp folds even in your heaviest cardstock. There is a scoring groove every 1/4 inch across the board. PERFECT for cardmakers! The smaller scoring version will also have dots to indicate the gate fold card measurements and an asterisk at the 4 1/4" point for easily identifying the A2 card placement. It will also easily allow you to identify the points to create the half brochure fold (inverted triangle). The makers of the Scor-Buddy have also moved the number placement ABOVE the numbers on the groove to easily find your correct measurement. Again - WONDERFUL IDEA!
The Scor-Buddy will come with a handy zipper case to protect it for traveling. It's small enough to keep on your work area all the time. This is one tool you will use over and over again! You can even use it with your Scor-Bug!
Mama Scor-Pal has recently delivered her newest addition to the family which was released at Winter CHA. It is the SCOR-Buddy!
Just like the larger version, the Scor-Buddy has deep grooves which allow you to run your Scor-Tool down the line without slipping out of the groove. It allows for crisp folds even in your heaviest cardstock. There is a scoring groove every 1/4 inch across the board. PERFECT for cardmakers! The smaller scoring version will also have dots to indicate the gate fold card measurements and an asterisk at the 4 1/4" point for easily identifying the A2 card placement. It will also easily allow you to identify the points to create the half brochure fold (inverted triangle). The makers of the Scor-Buddy have also moved the number placement ABOVE the numbers on the groove to easily find your correct measurement. Again - WONDERFUL IDEA!
The Scor-Buddy will come with a handy zipper case to protect it for traveling. It's small enough to keep on your work area all the time. This is one tool you will use over and over again! You can even use it with your Scor-Bug!
Monday, February 22, 2010
CRAFTING TIP OF THE WEEK (#25) SANDING
This week's tip is offered to address your "sanding" craft needs.
If you are looking to sand & lightly distress your papers & projects an emery board, nail filing block or nail file will do the trick just as good as any sander out there and for less.
Check out your local dollar store where you can buy a package of emery boards which can last you a while depending on how often you sand your projects.
If you prefer you can purchase a nail file block at the dollar store as well to use as your sanding block instead. Those blocks cover more surface and give you a better grip for sanding more surface. In addition, that sanding block can serve as a stand to hold your sharp paper piercing tools & needles.
I know that sometimes we would like the latest & name brands, creme de la creme, top of the heap, celebrity endorsed products on the market but in reality not everyone can afford them. Which is why I try to find alternate solutions that can save you money, time and frustration. What's more is that I try them before I recommend them and if they don't work, I simply won't write about it.
So I hope this tip & the many others I have shared come in handy.
Tuesday, February 16, 2010
Binder Clip Ribbon Handle Video Find
Thanks to Lauren M. for sharing this wonderful & creative idea.
I can't wait to use it.
Enjoy!
I can't wait to use it.
Enjoy!
Monday, February 15, 2010
MONEY SAVING TIP FOR YOUR CRICUT MAT IS THE TIP OF THE WEEK (#25)
Hello Everyone!
Hope you all had an enjoyable Valentine's Day.
This week I wanted to bring you a tip on how you can prolong the life of your Cricut cutting mat. Depending on how much you use it you can really go through the mats but with today's tip that may be a thing of the past.
You will need to invest in 3 things: a foam brush, a medium sized plastic container with a lid & Aleene's Tack It Over & Over Glue. Aleene's is sold at Joanne Fabrics & Michael's. There are some online vendors too. It runs anywhere from $2.79-$3.99.
Using the Aleene's is definitely a lot cheaper than having to buy a cutting mat every other month.
Here are the steps to putting the tacky back into your cutting mat:
1- Remove the transparent sheet from on top of the mat & set aside.
2- Take equal parts water & Aleene's Tack It Over & Over glue & mix it in a plastic container. You will have created your sticky mat solution at this point.
3-Take your foam brush and dip it into the solution applying a thin amount. A little goes a long way so you do not need to apply a lot of the solution. Then brush even strokes as if you were painting a canvas making sure to cover the entire cutting surface.
4-Once the entire cutting surface is covered, set the mat aside to dry.
5-While it is drying rinse out your foam brush immediately, making sure to get all the solution out of it. By doing it right after usage you will be able to use it for this application everytime.
6-Once your mat has dried clear, condition it prior to use by applying firm, even pressure in a blotting motion with your hands on the entire cutting surface.
7-Then you can place your cardstock or cutting material on the mat & begin using the mat or if you simply wanted to prep it for future use it is now ready. Place the transparent sheet that came with the mat over it & store until you are ready to use it.
That's all there is to it.
Happy Crafting!
Tuesday, February 9, 2010
FREE PAPER DOWNLOAD...
Monday, February 8, 2010
A VALENTINE LAYOUT OF MY PRECIOUS FIRST-BORN
CRAFTING TIP OF THE WEEK (#24) THE 3 R's
This week's tip mixes a little bit of a lot of good things like recycling, repurposing & reusing.
A while ago I had been on a hunt to find paint colors for our new home. I went to Lowes & Home Depot and scoured their paint section. I ended up with many paint swatches. It was in that instant that I knew that those paint swatch booklets, squares & rectangles were going to serve me well in many more ways than their manufacturer could imagine.
And so with many of them in hand I headed home for what was sure to be an interesting day of crafting & let's not forget the real reason I grabbed those to begin with...the picking of paint color.
I realized that those very swatches were useful in helping me with color selections for layouts, card making & crafting projects. Some swatches had multiple colors arranged to give you grading variations of colors within the same family so you could use monochromatic schemes (and apply them to your projects). The booklets which showed different rooms with both the main wall colors & complimentary colors were reflecting what several color combinations together would look like. Yet again, another great assist when chosing color for your projects. You could really visualize color concepts and how they complimented or played off one another.
Then I looked at the single color swatches & instantly saw that they could be used on their own or in a conglomeration of ways. I could do a paper quilting effect, I could use punches with them, I could embellish them & incorporate them in to my projects as well. You could use them as matting for your photos & cards, you could make little gift tags with them, you could make mini cards to attach to your gift bags and so much more. The possibilities remain endless.
So next time you walk into your local home improvement store head over to the paint section & grab yourself some paint chip samples.
They are printed on a nice grade cardstock and come in different shapes & sizes. They even have those Mickey Mouse shaped ones...who couldn't use those for their Disney themed pages? Whether you have been to Disney or have seen a Disney movie...most of us have a Disney memory that we can incorporate into our craft project or gift to someone who has. You can make number and alphabet flashcards with them for your toddler incorporating the learning of colors as well and even bind them together with a binding ring behind Mickey's ear.
Go ahead give it a shot.
This week's tip was brought to you by ...all the paint chip samples of any local paint store.
What ya waiting for?
Go get you some!
Happy Crafting ...
Saturday, February 6, 2010
ONE OF MY FAVORITE LAYOUTS ...
Pay no mind to the date of course...suffice it to say I am way behind on my scrapping.
I did this layout for a contest submission at my LSS & it tied as a winner.
I love my family!
I am so truly blessed!
Hope you like it.
Now that I somewhat have my cell phone camera figured out, I will be posting more of my creations hoping to inspire you as much as I have been inspired.
Happy Crafting!
A LITTLE OF WHAT I HAVE BEEN UP TO LATELY...
Okay, these are not the best pictures but I have resorted to using my cell phone to take pics of my creations in order to start posting them on my blog.
I had an order for a simple but pretty bridal shower invite incorporating the colors you see & I think I captured what they wanted. I mailed them out to my client and their feedback was wonderful, they were very pleased.
The bridal party colors are this watermelon pink & green.
I used a cream cardstock which I masked off & bordered in green ink then I did a stamp resist technique with some cute stamps to offset the images which were of little swirls. I debossed the area where the green is but I don't think it comes across on the photos. These turned out so much better in person. I placed an embellishment of either a bow, a bling or a ribbon knot.
I used my computer to print out the shower details alternating the pink & green colors.
I am relieved & pleased that my clients got exactly what they wanted. That is the ultimate goal when creating unique, one of a kind creations- it is special.
Thanks for stopping by.
Great Video Find on How to Make Crepe Paper Flower Rosettes
Brought to you by Kellie...
Love this technique~ hope you get a chance to try it on a Valentine's Day project or even for that special Mother's Day card.
Enjoy!
Love this technique~ hope you get a chance to try it on a Valentine's Day project or even for that special Mother's Day card.
Enjoy!
Thursday, February 4, 2010
Wednesday, February 3, 2010
THE CINCH
MAY NOT BE TUESDAY BUT THIS IS A TOOL SO IT HAS MADE IT'S WAY INTO THE TOOL TIME SEGMENT!
Check out this new binding tool by We R Memory Keepers debuted at CHA IN 2010...
Scrap Time - CHA Winter 2010 - The Cinch from Mark Giles on Vimeo.
LOVE STRUCK CRICUT CARTRIDGE GIVEAWAY...KEEP READING
Hi everyone! I recently discovered 2 lovely blogs:
http://natalie-embracinghisgrace.blogspot.com & http://scrappinstyle.blogspot.com
Natalie posted about Amy's LOVE STRUCK CRICUT CARTRIDGE GIVEAWAY to share the exciting news.
You have just as good a chance of winning as anyone else so head on over to AMY's blog at: http://scrappinstyle.blogspot.com and do the following:
1-Follow her blog
2-Post about her great giveaway on your blog or tell others about it via another medium
3-Leave a comment on her giveaway post w/ a link to your blog or telling her how you spread the good news and a way for her to contact you if you should win.
That's it!
Rather simple...
So go ahead & visit these 2 blogs & show your support.
Good luck everyone!
Subscribe to:
Posts (Atom)