*** GIVEAWAY POST FOR 500 OR MORE FOLLOWERS IS DATED SEPTEMBER 1ST, 2011***

Please leave your comment under the GIVEAWAY post for consideration in the drawing. Once I reach 500 followers I will select a winner! Thank you kindly.

Tuesday, February 26, 2013

Tool Time Tuesday- The AdvantEdge Punch


Hey Crafty Friends!

Today's tool is brought to us by Fiskars & it's the newly debuted AdvantEdge Border Punch Tool.

Check it out in action: 


Doesn't it look cool? 

It is available at Scrapbook.com & Joann's stores. 

It's so fun to see all the cool tools out there. I may not own them all but it is interesting to me to see what they continue to bring to market. 

I'll be back with another tool next Tuesday...stay tuned. 


Monday, February 25, 2013

Crafting Tip of the Week#169- Got Left-overs?

Left over alphas that is my crafty friends.

Do you find yourself having extra letters in your stash of alphas?
Why not put them to use by monogramming?


I love the idea of personalizing my crafts especially those I make for gift giving, how about you?

Why not combine those two aspects of our craft world and use extra, left over letters to monogram.

You can monogram scrapbook layouts, mini albums, shadow boxes but you can also take cute trinkets, baskets, vases, potting plants, frames, plates and other household items and doctor them up with your left overs.

Check out some of mine below:

I made napkin rings which I monogrammed with the letter of each dinner guest using these black & white chipboard letters I had left over from a set of letters.


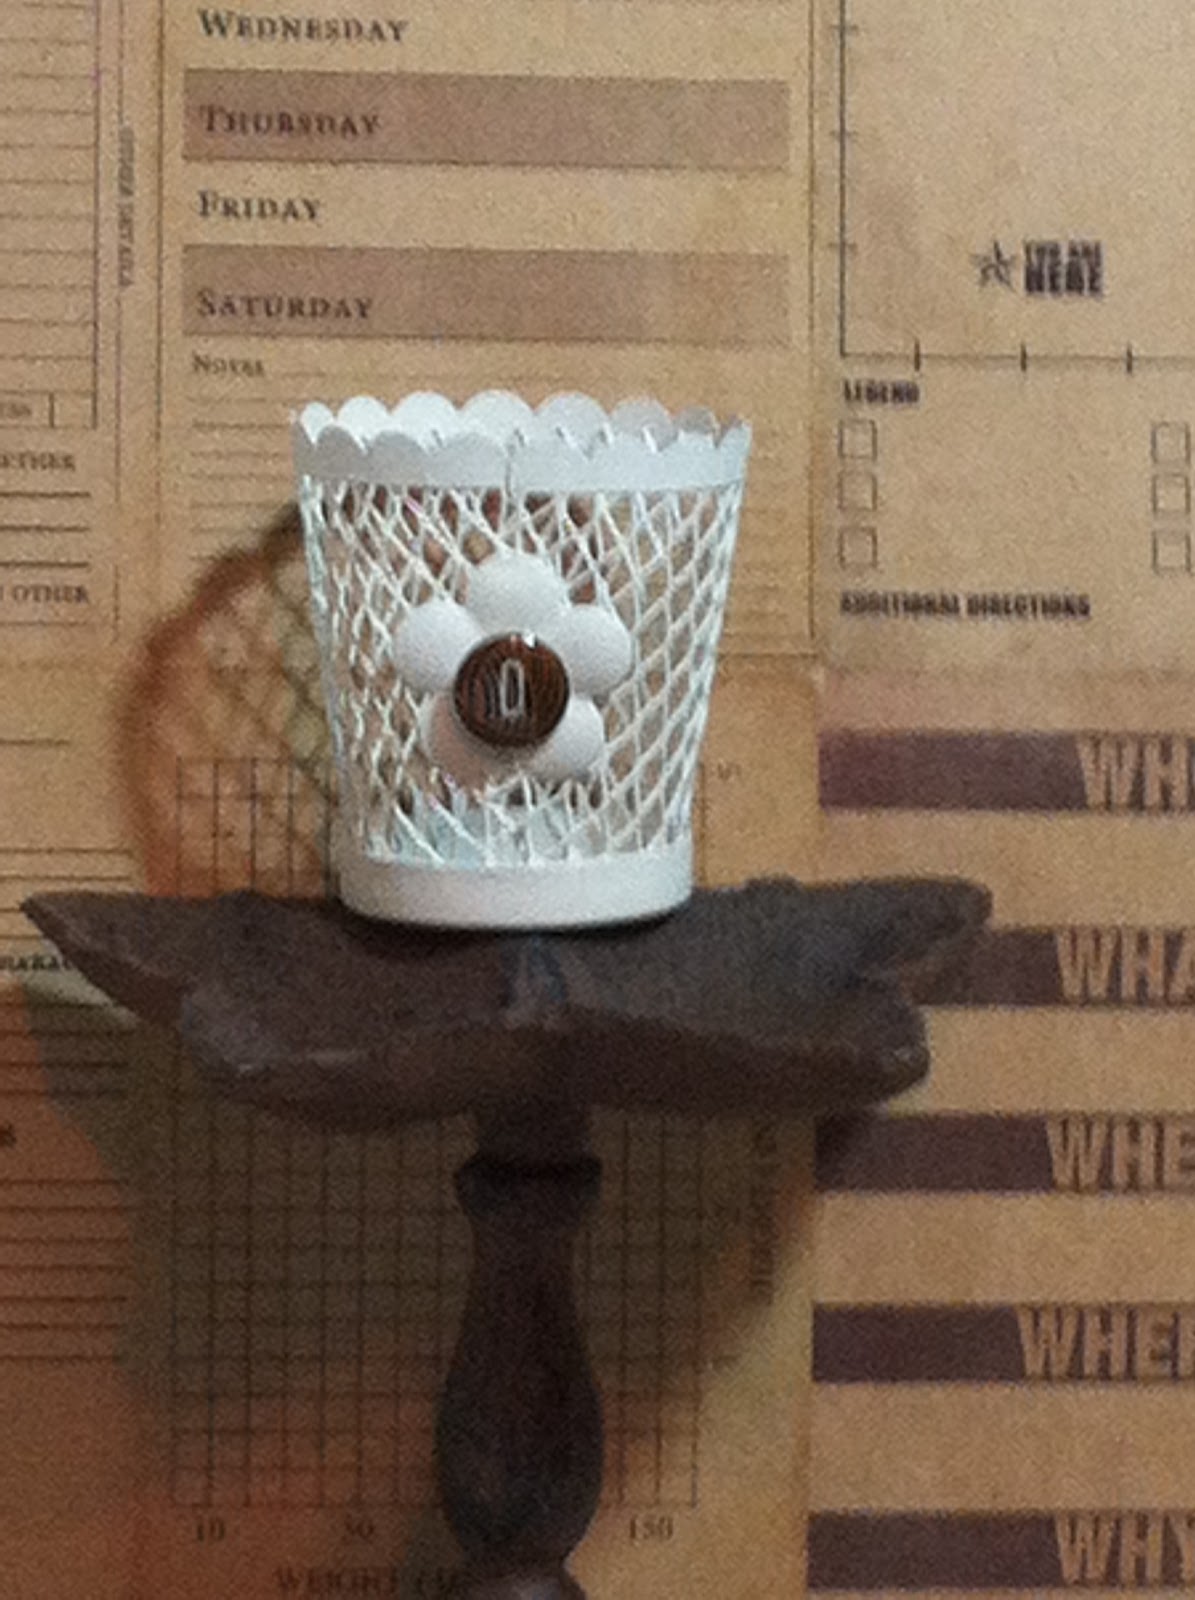
Then I monogrammed a little votive holder which I am actually using to place a bunch of chalk inside of to gift along with a desk top chalkboard...the recipient's name is Olivia. I used the  "o" as a center for  the flower. 


Lastly, I monogrammed a little notepad for my youngest daughter. I used some left over plastic, Heidi Swapp letters from an old collection I had hanging around.


I love monogramming!

Now go through your collection of alphabets & see what great things you can personalize &  monogram.

I feel like monograms are so personal and add such a special touch to anything. They really say, "hey...I made this with you in mind"! So next time you have a gift to get, think about personalizing it with your left over letters.

Letters come in all sizes, shapes, dimensions and even if you just die cut some out of plain ol' cardstock you could always jazz them up & put Glossy Accents on them to make them stand out.

The name of the game here is...try using your left over letters in clever ways. Monogramming is one of my go to ways.

How about you? Got any ideas for left over letters?

Hope this one sparks many!

Take care & have a great day.

Friday, February 22, 2013

Fabulous Friday Find- The YES PLEASE Collection


Hello There Crafters!

Thanks for stopping by today. 

Today's showcase is by Amy Tangerine & also debuted at the Winter CHA 2013. 
It's her YES PLEASE Collection which is filled with so many wonderful surprises and also some staple 
pieces that we have come to know & love from American Crafts. 

Take a look at the video brought to you by Noell Hyman of Paperclipping.com:


Isn't the collection adorable?
Oh the things we can make with this collection!

Enjoy your weekend.


Tuesday, February 19, 2013

Tool Time Tuesday- The Zutter Bow-It-All


Hi Crafters!

Today's tool is brought to us by Zutter-it's the Bow-It-All!

It's a tool that helps you make all kinds & shapes of bows. For those of us who love bows but don't love making them, this tool's for you. 
Bows are great for use in crafting projects but how about for gift wrapping & making pretty girl hair accessories? 


Check out this video shared by Crafttestdummies:


Isn't it a clever tool?

Hope you enjoyed & will tune in again. 


Monday, February 18, 2013

Crafting Tip of the Week#168- Measuring Up!


Good Monday to you all!

Today I thought I would share a little info about measurements on your paper cutters & trimmers. 

I for one struggled in the early days with getting measurements correct when using trimmers. 

I never really had anyone show me how to use one and I could not recall for the life of me all that I learned in school (way back when) with regard to measurements. 

So I set off on a mission to learn. There are some good videos out there. 

But I wanted to have a point of reference that I could keep with me on my workspace so I took an inexpensive measuring tape ruler & basically doctored it up to help me keep my measuring skills in check.
I simply wrote the measurements using a fine point sharpie above the actual tic mark and use it as a reference point. 

I then took it over to my paper trimmer and transferred the measurements accordingly. 

I did not use metric measurements as I am most comfortable with the old school inches. 

Just keep in mind a couple of things. There are 2 kinds of measurement increments. The 1/8th" & the 1/16th". 

I used the 1/16th inch.
So my measurements read as follows: 

1", 1 1/16", 1 1/8", 1 3/16", 1 1/4", 1 5/16", 1 3/8", 1 7/16", 1 1/2", 1 9/16", 1 5/8", 1 11/16", 1 3/4", 
1 13/16", 1 7/8", 1 15/16", 2", etc...

There...that takes you from one inch to 2 inches in one sixteenth increments. 

I found this older video by Angie Kennedy of the Chic'nScratch blog. She does such a great job of explaining how to use your paper trimmer and measuring. She specifically uses a Fiskars Trimmer. She also skips some of my measurements above but it all ends up being relative.

 Check out her video below:


Hope you found this insightful. I know that many of you avid crafters probably know how to use paper trimmers & have the measurement system figured out but for some reason I felt compelled to share this info.

I hope this helps someone out there.
Have a great week.


Friday, February 15, 2013

Fabulous Friday Find- Prima's Lifetime Collection


Happy Friday Friends!

Today's find is the newly debuted at Winter CHA 2013 Lifetime Collection by Prima. 
Check out all the goodies in the video below:


Looks gorgeous right?

Keep coming back the next few fridays as I share the other collections which were debuted at Winter CHA 2013.

Have a wonderful weekend!


Tuesday, February 12, 2013

Tool Time Tuesday- The Golden Cuttlebug

Hello Crafty Friends!

Today's tool is brought to you by Anna Griffin & Provo Craft & it is the GOLDEN CUTTLEBUG!

It does everything the Cuttlebug is known for but with a more elegant twist!
Anna Griffin partnered with Provo Craft to also bring embossing folders to go along with the Golden bug. 

Take a look :


Here are some of the embossing folders from Anna Griffin: 


Just Divine!


The machine is a lovely piece but what we love more than its looks is the lo tech, high impact effect of the Cuttlebug.

This debuted on HSN.COM along with a configuration of embossing folders and it sold out. Not sure when they will be getting more in stock but it sure seems like a good one to keep an eye out for so you can add it to your crafting arsenal. 

Can never go wrong with Anna Griffin products. It's sophisticated, elegant crafting at its' finest. 


Monday, February 11, 2013

Crafting Tip of the Week#167- The NOT SO Lazy Susan

Hey Crafty Friends!

I am not sure who came up with name Lazy Susan for this fantastic, shall we call it, versatile "kitchen" accessory.

You know the one...it looks like this:


These fabulous work horses can work wonders in your craft space. Whether you have an entire room dedicated to your crafting or just a small space on the kitchen table. You can use the Lazy Susan for storage and function. 
For instance, you can adhere a piece of styrofoam with removable adhesive on to the platform of the Lazy Susan & use it to hold items you need to paint. Much like frosting a cake, you can spin the Lazy Susan ever so slowly & ensure great coverage on your piece because you are able to rotate the item 360 degrees to get full coverage.  You can also cover the surface of the Lazy Susan so you don't get it dirty or painted on & use it as a surface to glitter, emboss with embossing powders & flock. Love the 2 tiered option too. Great for techniques on top & storage on the bottom. 
I am sure you can come up with a few ideas of your own. Seems to work that way for us crafters. One small idea turns into many big ones and thus terrific products are born in our industry. 

Next time you see one of these "Lazy Susans" I bet you won't think them so lazy anymore!

They vary from $1.00 USD & up. I have even seen a small one at the Dollar store for that ever so wonderful dollar.

Have a great week.


Friday, February 8, 2013

Fabulous Friday Find- The ViewTainer


Hi Crafters!

Today's find is fresh off the farm fabulous!
It's the VIEWTAINERS which were debuted at Winter CHA 2013.

Check out the video below from Scrapbook.com:


Love the functionality. You can use this in all sorts of places but the craft room seems like a great place to start.  It's great that they have such varied sizes to accommodate all kinds of items. The fact that you can see what is stored inside is also a great feature.
You can contain so such a variety of items in these. I could definitely see these being used all around the house, garage, office, playroom,etc...

Thanks for tuning in.

Enjoy your weekend.

Tuesday, February 5, 2013

Tool Time Tuesday- An Envelope Punch Board


It's that time again crafters and this time We R Memory Keepers has brought us another clever tool which they debuted at the Winter CHA 2013 Show.

It's their Envelope Punch Board. With this board you can make over 60 sizes of envelopes.

Check out the video with all the details:


It is expected to reach the retail market real soon.

Wouldn't it be a great way to make use of all that extra paper in our stash? C'mon, you know as well as I do- we hoard paper.

With this tool you will be able to customize and coordinate your own envelopes with your handmade cards. What a treat for the recipient!
Who among us hasn't run out of envelopes at some time or another? with this you need not worry any longer. You can make as many as you want anytime you want.

It will retail for $19.99 and was scheduled to come to market by the end of January.

We R Memory Keepers does a great job of not only bringing us innovative products but affordable ones too.

Monday, February 4, 2013

Crafting Tip of the Week#166- Make your Picture Frames Friendly!

Hello There!

Did you guys know that you could avoid issues with photos sticking to frames by doing one simple thing?

I know, last week I covered what to do if your pictures were stuck to a frame but wouldn't you just love for that not to be a problem?

One sure way to do that is by...
 USING PHOTO MATS! Ever notice how most photo mats have a thickness to them. That is by design my friends. It is intentionally done that way to allow for "breathing room" between the photo & the confinement.

Photo mats keep pictures from coming into contact with the glass of the frames.

So keep this in mind when you are placing your pictures into frames.  MATTING your photos is worthwhile. It not only looks nice but it can protect the life of your photo in the frame & keep it from sticking.

Have a great week ahead!

Friday, February 1, 2013

Fabulous Friday Find- A Craft Armoire


Brought to us by the lovely Jinger Adams of Provo Craft Fame... It's her over the door/ wall mountable CRAFT ARMOIRE. 
Here's a pic of it open on display at Winter CHA 2013.


Check out the video where Scrapbook.com staffer gives us a tour: 


Not sure of a price just yet but rumor has it she may be selling it on HSN this Spring or Summer. 

Isn't it dreamy? What a great idea! I love the idea of a functional piece having beauty, storage and practicality all in one. 

It's genius!

Have yourself a great weekend & thanks for tuning in.