*** GIVEAWAY POST FOR 500 OR MORE FOLLOWERS IS DATED SEPTEMBER 1ST, 2011***

Please leave your comment under the GIVEAWAY post for consideration in the drawing. Once I reach 500 followers I will select a winner! Thank you kindly.

Tuesday, December 25, 2012

A Holiday Greeting from me to You!


May God bless you
with His abundant
store of riches and love
throughout the Christmas season 


Thank you for your friendship,
Good will and loyalty.
May the happiness and good cheer
Of the holiday season be yours
throughout the New Year too.


Below is a little reminder of what Christmas is truly all about: 


Friday, December 21, 2012

Fabulous Friday Find- SCENTZ


Hello Blog Friends!

Today's find is brought to you by: COLOR BOX & it is their SCENTZ embossing powder!


Clearsnap-ColorBox Scentz embossing powder gives your design texture AND...wait for it....
MAKES THEM SMELL GOOD TOO!
These scented embossing powders come in cute little jars  that hold .5 ounces. 
ColorBox offers several scents which include: peppermint, root beer, bubblegum and grape.

They retail for $4.99 USD.  You can find them at Archiver's online annex & Archivers Store.

What will they think of next?

Hope you enjoyed this find!

Have a wonderful weekend.

P.S.
The last 2 weeks of this year I will not be posting my usual content so that I may dedicate that time to my 
family. I am working both the days before  and after Christmas & New Year's so I will be a busy lady. I will be traveling to see family as well.


Tuesday, December 18, 2012

Tool Time Tuesday- The New Silhouette Portrai

Hello Dear Crafty Bloggers!

Today's tool is brought to you by Silhouette America & it's the : SILHOUETTE PORTRAIT die cutting machine. Much like its'  big brother the cameo, it die cuts like butter.
Check it out:


The precision cuts and plethora of image options in the Silhouette online store make this one super sweet piece of mechanical engineering.

You can create and cut your own designs and use the fonts already installed on your computer with the Portrait as well.

 It retails for $199.99 USD, cuts a maximum width of 8 inches, weighs only 3.5 pounds and has a smaller footprint altogether.

It's a great alternative to the Cameo if you find that one too pricey or if it's more than you need.  What a great gift for your wish list!

That's all for today.

Monday, December 17, 2012

Crafting Tip of the Week#161- Murphy's Oil Soap Indeed!

Hi Crafty Friends!

Have you ever heard of Murphy's Oil Soap?

It looks like this:
This stuff can help you with household applications but  did you know that it can help with stubborn paint on your paint brushes?

Next time you find you have paint brushes with gooped on, caked on, stuck paint- dip the paint brush in Murphy's oil soap for 24-48  hours & watch that junk float off.

Have a great week!


Friday, December 14, 2012

Fabulous Friday Find- The Ultimate Pen Organizer


Hello There!

You made it to Friday-yay!!!

Today's find is brought to you by the cool folks at The Scrap Rack.

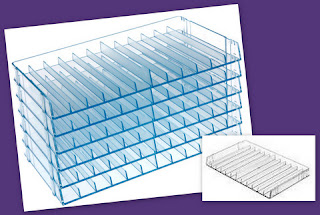
It's the Ultimate Pen Organizer.
Check it out:


 Doesn't it look great?
 A versatile storage solution that fits all pens up to 17mm (5/8”) in diameter. This modular system can be customized to your personal craft or work space as it can be built up in three different ways - horizontally, vertically or angled.
Each unit will hold twelve pens and they can be stacked as high or as wide as you require.
 
They do sell 1 single tray that holds 12 pens for $8 and larger units too.
Love that you can store the unit itself in different ways. 
 

Have a wonderful weekend!

All the best & crafty goodness!

Sonia

Tuesday, December 11, 2012

Tool Time Tuesday- Martha Stewart- Mini Score Board


Hello Crafty Friends!

 The Martha Stewart  MINI SCORE BOARD is all you love about the traditional size score boards only smaller.

This mini packs maximum punch.


This size is ideal for traveling, for cards, for photos for small craft projects that need precise folds like paper fans, flowers, rosettes, envelopes, etc...

It's priced @ $10.99 USD at Hobby Lobby.

It's a honey of a product to have in your arsenal.

oh, swoon...
Enjoy your day!


Monday, December 10, 2012

Crafting Tip of the Week #160- Craftcycling...

 Happy Monday Crafty Bloggers!

Today I wanted to share another craft recycling idea.

I am sure I will have more to add as I keep finding ways to use things I might otherwise discard.
This week I wanted to share that if you find yourself buying drinks in clear plastic cups that come with those domed plastic lids, you should keep them.

They are great to contain paint, glue, water and other crafty solutions that you need to use with a paint brush.
Here are a few reasons why:
1- You can control how much you want to use for a particular project and only pour in a small amount at a time. It's better to use a little at a time and add to it as you need it.
2- If the product is in its' own container with its' own assigned brush you won't contaminate other paints or solutions.
3- You will have a lid on it with a hole in the center that will allow for some time to rescue your liquid product being contained if it falls over-spill control.
4-You can rest your brush inside the cup.
5-You can easily see what is inside.

 Now you may come up with some more ideas as to why this would work for you and that would be great. I just know it's been a big help to me the few times I tried it. It's especially handy when you have kids working on school projects that involve paint.

Hope you remember to craft-cycle your see thru-dome lidded cups!

Tune in tomorrow!

Friday, December 7, 2012

Fabulous Friday Find- A Brush & Stencil Cleaner

Hi Crafty Friend!

Today's find is brought to you by: Martha Stewart. I know...what a surprise!

It's her Brush & Stencil Cleaner.

This product is a water based cleaning agent that removes water based paint and finishes from brushes, tools and stencils.


Who among us couldn't use this some days?

I know a mild soap & water combo can do the trick too but for those sometimes stubborn water based products that take a little more scrubbing, this just might do the trick.

At the very least you know there is something out there made just to remove water based paints & finishes from your brushes, tools and stencils.

Have a wonderful weekend!


Tuesday, December 4, 2012

Tool Time Tuesday- A Flex Ruler


Happy Tuesday Crafty Bloggers!

For today I thought I would share this novel little ruler brought to us by: BO BUNNY!

It's their 20 inch Flex Ruler.


You can:


  • Embellish your scrapbook pages with help for the Bo-Bunny flexible ruler
  • Add this inventive tool to your arts and craft supplies
  • Works wonders on all home or school art projects
  • 20-inch flexible ruler is perfect for the hot new trend of wavy borders on layouts, cards, and more
  • Create swirls and circles or any shape you can bend it to
  • Trace around the end of the ruler and cut out the desired shape

This flexible ruler then rolls into a small shape easy to take along to crops, scrap getaways or simply keep right at your side during crafting time.


Good things really do come in small packages!

Monday, December 3, 2012

Crafting Tip of the Week#159- Tip about your Tips...


Hello Crafty Friends!

So you have any idea about the title for this week's tip?

I'll tell ya...it's all about saving your Elmer's glue top tips, those orange ones that look like this:


You simply  take that entire cap & screw it onto a Plaid/Folk Art Acrylic Paint Bottle and it will give you great control during application. It  will help you to actually apply the paint in easy strokes of fine lines giving you the ability to  do things like write names with your paint, draw intricate shapes and even trace elements with your paint.

So think twice about discarding those orange screw caps. They fit snuggly on some of those acrylic paint bottles and can really aid your creative process with paint. Think twice before discarding those orange screw cap lid and turn them into your acrylic paint fine tip tops.

Thanks for stopping by today.

Have a great week.


Friday, November 30, 2012

Fabulous Friday Find- Another Martha Stewart Goodie...

Happy Friday Friends!

Today I want to share a little something useable when we are dealing with glitter & paint.

It's from Martha Stewart & it's her Glitter Tray & Rack!


This Glitter Tray & Rack are made of low-static coated metal so glitter slides off easily. The built-in opening makes it easy to sweep excess glitter back into jar with included brush. Removable drying rack with peg design is perfect for drying 3D objects without the glittered surface.
Contents:
  • 1 metal tray
  • 1 drying rack
  • 1 brush
The tray measures approximately 8 1/2" x 10 1/2".


This little helping hand retails for $21.99 at Hobby Lobby in store & online.

Guess you could say I am on a Martha Stewart kick.

You will be seeing more ingenious things from the Crafty Maven next week so please tune in.

Have a great weekend!


Tuesday, November 27, 2012

Tool Time Tuesday- The Circle Edge Punch

Hi Crafty Blogger!

Today's tool is brought to you by Martha Stewart & it's her  newest addition to her punches:

The  CIRCLE EDGE PUNCH!

Check out the video below by the Crash Test Dummy Guru Jenny:


Pretty neat right?!
You can find it at HSN now where it debuted this month.
It is not yet out in stores.
It retails for $59.95 USD at the moment on HSN & there are other shape attachments you can purchase separately too.

Look at the different edges they can produce:

So cool! Thanks for tuning in today.

Have a happy day.


Monday, November 26, 2012

Crafting Tip of the Week #158- Baby Bottle Brushes Not Just for Baby Bottles Anymore!

Hello Crafty Friends!

I bet you're wondering what I am alluding to with that off the wall post title.
Has it got your wheels turning?
Any guesses?
I suppose I shouldn't make you wait any longer then.
You know how a couple of Fridays ago I shared those adorable "Woodlands" ornaments from Tim Holtz?
Well, I got to thinking.
Couldn't I find a way to make that adorable Christmas tree myself?
Well, I sure did.
Here's what you'll need:
*Baby Bottle Brushes (You can find them at the Dollar Store)
*Wood cubes or circles for your base( Any local craft store carries them & some dollar stores too)
*Glue Gun/E6000 (A strong adhesive)
*Wire Cutter/ Scissors may due in a pinch
*Sharp Scissors for cutting the bristles
*Glitter/Mica Flakes
*Spray Adhesive
*Optional (spray paint, spray inks, mini misters with your own concoction of color to add to your tree)
 Since the bottle brushes come in white already it lends itself to a white Christmas feel . The inks would be if you wanted to add color or give it a vintage look.

Basically, you cut the brush portion of the bottle brush off its' base using a wire cutter. Then cut the brush in half or to whatever size tree you want. Then you cut bristles on the right & left at an angle, creating that tree shape. After that you adhere the bottom of the tree to your wood base piece.
If you want it raw that is all you do.
If you want to add color to the bristle brush &/or base, I suggest coloring, inking or painting them first. Then after they dry you can assemble them.
They should look like this:
I decided to use empty spools of thread I bought at my local scrapbooking store and I adhered card stock. I also used spray glitter on the trees after spray painting them an ivory color.
It is difficult to see how adorable they are  in person.

You can easily add little beads, tiny garland made from jewelry findings or petite tinsel. The possibilities are many. You have to try it out.

Have a great week.


Saturday, November 17, 2012

Thanksgiving Hiatus


Dear Friends & Followers, 

This week I will be taking a blog break to prepare for Thanksgiving, spend time with my family & of course...work. 

However, I wanted to take a moment to leave you all a message from my heart.


Hugs, 

Sonia...The Archiving Angel

Friday, November 16, 2012

Fabulous Friday Find- A Download!

Hello There!

Today's find is a computer download for SCRABBLE TILES!

If you're like me & you love them, well now you can purchase a downloadable zip file and have them all the time.  They look like the image below:


You can purchase them off of the scrapbook.com website where I believe the download is $2.49 (USD). No need to spend on shipping, handling, delivery of any kind. It will come right to your computer.

I thought the price was reasonable and you could use these for many applications and projects.

Hope you enjoyed this find.

Have a great weekend!

All the best & crafty goodness, 

Sonia

Tuesday, November 13, 2012

Tool Time Tuesday- A Little Something Useful

Hey  Friends!
Thanks for tuning in today.

Today's tool is small but super handy especially for those of us who like to bling it up!
Any guesses yet?

It's a glitter funnel set!
This set comes with 2 funnels great for all types of glitters. It is brought to us by Advantus, the same folks that work with Ranger & Tim Holtz.

But it just doesn't have to be for the many types of glitters out there like fine, ultra fine, fragments, chunky, vintage & more.
You can use it for flocking powder, micro beads and mini pearls too.

This tiny tool (helper) costs only $.99 cents.

Now that's a bargain!


Hope you enjoyed this simple share.


Monday, November 12, 2012

Crafting Tip of the Week #157 - Don't Fret over Fraying


Hello Crafty Friends!

Thanks for tuning in today. Today's post is more of a quick tip on one way to help stop your ribbon from fraying once it has been cut.

I am sure most if not all of you know about  using the heat of a lighter but did you know that you can use glue to seal your ribbon edges?

Yes, that's right. As long as it is a wet glue...it will do.
Simply place & spread a small, thin bead of glue along the edge of your ribbon, seam binding and even lace edges and it will seal them beautifully.

I have had the most success with the following glue:
-Martha Stewart white glue with the brush attachment (white glue)
-Tombo Mono Adhesive in the green bottle (white glue)
-Mod Podge (white glue)

There is no need to use a lot, just make certain to cover the edge completely and let it dry.

From my experience it would seem the white glues are the most successful for this.
Most of us already have adhesive on hand in our craft room so it is great to have yet another use for it.

Have a wonderful week!


Friday, November 9, 2012

Fabulous Friday Find- It's from Tim Holtz...Need I Say More?

Hey All!

It's Tim's "Woodlands" Christmas Ornaments Collection!
Aren't these the cutest? Imagine all the gorgeous Christmas projects you can create with these. Canvases, shadow boxes, 3D Art & more.

You can purchase it HERE for under $5 USD.

Have a great weekend everyone!

Tuesday, November 6, 2012

Tool Time Tuesday- Tab Punches

Hi there!
Thanks for tuning in today.
For today's tool I am sharing the new Tab Punches by We R Memory Keepers.
They were debuted at Summer CHA 2012 and are now out for purchase.

Check out the video:


These would work wonderfully in all sorts of applications. From making dividers for your albums, on cards , on recipe cards, on index cards, etc...You get the idea.


Just love these!

You can purchase them HERE .

Monday, November 5, 2012

Crafting Tip of the Week #$156- Don't Ditch that ...

Overused Cricut or Silhouette Mat! You know the ones, my crafty friends. When you have used up your  cutting mats til' they just don't work for you anymore why not craft-cycle them? I know you can always reapply adhesive and continue to use them but in the event that you don't want to do that I have some other uses up my sleeve.

I know what you're thinking...how in the world can I use that in my  craft projects?
Well, simply put- it's not for your actual projects.

You can use it to help you during your creative process- just make sure there is no more adhesive left on it. Otherwise, it won't work.
Here are a few ideas:

1- As an extra cutting surface. For example: if you are using a rotary knife to cut fabric, you can place your fabric on your worn (non-sticky)  mat & use your rotary knife on it. You can also use your craft knife for fussy cutting. After all, it is a cutting mat.
2- As a back up cutting surface to take to crops. Just leave it in your crop bag & label it with a permanent marker. 
3- As a measuring guide.
4- In a pinch as an extra surface for inking, painting & chalking.
5- To set your acrylic stamps on temporarily when you're working with several at a time. You can lay them out on the mat, figure placement and keep them there until you are ready to work with them.

Maybe you can think of some more uses. I sure hope you find this helpful.
Have a wonderful week!

Friday, November 2, 2012

Fabulous Friday Find- Scissor Holsters!

Hello Crafty Friends!

Yes, you read that right...Scissor Holsters brought to you by Westcott.

The funky and fabulous scissors holster attaches to your belt or apron, making storing scissors easy, safe, and stylish! 


This decorative holster can fit scissors measuring up to 8 inches long, so it’s great for holding your tiny tape and glue scissors, as well as your heavy duty fabric and paper scissors.


It comes in other funky finishes as well.

Check out the video below:


Hope you enjoyed this fabulous, fun find!
Have a wonderful weekend.

Wednesday, October 31, 2012

HAPPY HALLOWEEN!

 Hi Crafters!

Thought you might enjoy a little Halloween Humor.

Check out the video below:


Have a SPOOKTACULAR day!

Tuesday, October 30, 2012

Tool Time Tuesday- The Procision Paper Trimmer by Fiskars

Hey there Crafters!
Today's tool is brought to you by Fiskars & it is their new Procision Paper Trimmer.

This brand new rotary trimmer  features a unique dual-rail system that stabilizes the rotary blade, eliminating wiggle for straight, perfectly precise cuts. As a bonus, it cuts a wide range of thick materials. Additional innovations include a spring-action rotary bypass blade that stays sharp and never needs to be replaced, a built-in paper guard, grid line measurements on the top and bottom so you can use the base to your left or right, a top-quality work surface for long-lasting performance and a convenient folding design to take up less space during storage and transport. Other features include:
  • Paper Guard - Lifts open for easy project placement
  • Rotary Bypass Blade Carriage - Bypass cutting style means the rotary blade never gets dull and never needs to be replaced (Love This!)
  • Accuracy - Bold accent grid lines include 1/16" increments and metric measurements
  • Permanent Grid - Anti-wear grid printed from underneath
  • Expanded 2.5" Grid - Opposite-side extended work surface provides versatility for cutting extremely narrow materials
  • Folding Deck - For easy storage and transportation (13" base deck that folds at 5.75" grid line)
  • Rubberized Feet - To keep the trimmer in place and protect work surfaces
  • Carriage Storage - Blade carriage locks into storage slots at either end so you can lift the paper guard and rearrange materials
  • Paper Guard Lock - Secures Paper Guard to hold your project in place while cutting

  •  Check out the video below :


    It retails for $119.99 USD.

    Yes, a bit pricey but this one sure has lots of upgraded features. Wish we could use a coupon on this puppy!

    Monday, October 29, 2012

    Crafting Tip of the Week #155- Shoeless Shoe Storage

    Hi Crafty Friends!

    Today I thought I would share a storage solution tip.

    You know those shoe cubby storage units designed to hold your shoes?
    Why not give it a try in your craft room?

    I purchased one at Target on sale for under $15 USD and it has 15 cubbies.
    I then purchased some really cute bins from the dollar spot at Target to place inside the cubbies and those hold my flowers.
    Want to see?
    Sorry for the poor quality of the photo but you get the idea.
    I plan on painting those containers because they don't really match my decor and I wanted them to be a neutral color. Then I will hang really cute tags or make labels to place on them identifying the color of flower in each container.
    The empty one is sitting on my craft table. I was able to separate my flowers by colors using this cubby system and it is working great for me. Whenever I want I simply grab the container I need, look through it and select my flower of choice. Then I can easily place the container back in the cubby.

    You could certainly store other things as well. They are rather deep so you could fit 2 of these particular bins per cubby if you needed too. You don't necessarily need to place a storage container in the cubby hole. You can simply use as is to store your hand held tools, adhesives, punches, stamps, acrylic blocks, paints, etc...
    You can definitely get a lot of products, embellishments, tools and other useful crafty items stored in one large surface area with definite separation.

    I hope you found this tip helpful.
    Have a wonderful week!


    Friday, October 26, 2012

    Fabulous Friday Find- The Heidi Swapp Memory File System

    Happy Friday Friends!

    Remember how earlier this week I alluded to the find?

    Heidi Swapp has come out with a Memory File System using her own gorgeous file folder designs.

    Check them out:


    Here's a video for a closer look:


    I know they are for sale HERE .


    What a fabulous way to take a file folder to the next level!

    All the best & crafty goodness...Sonia

    Tuesday, October 23, 2012

    Tool Time Tuesday- Another App by none other than...

    Our Crafty Maven....Ms. Martha Stewart!

    It 's her Craft Studio App.

    This awesome app costs $4.99 USD and is available for the i-Pad.

    With this APP you can create keepsakes, assorted greetings, invitations, thank you notes & more. You can choose from an array of colored & patterned paper swatches, import your own photos, embellish with glitter, stamps and stickers. Then you can share them with a tap of the finger. You can send your creations via e-mail, on Facebook and even upload to Snapfish!

    Oh technology!

    Isn't it awesome?

    Hope you enjoyed this week's tool!

    All the best & crafty goodness...
             Sonia

    Monday, October 22, 2012

    Crafting Tip of the Week #154- File Folders are Your Friends

    Hello Crafty Bloggers.

    Today I wanted to share information on how you can use regular, ol' manilla file folders in your crafting.

    I am certain by now you have seen Heidi Swapp's Memory File System. But if not, come back for a visit on Friday for the find.

    Manilla file folders can make great additions in any craft space and not just for organizing your paperwork either.

    By decorating, embellishing, inking and customizing plain manilla file folders you can use them for all sorts of crafty ideas.
    Their sturdy composition and smooth texture really make them strong, suitable candidates for lots of applications.

    Below are a few:


    - Storing & Filing your 8 1/2x 11 cardstock
    - For scrapbooking inside of them
    - For cutting in half & attaching to your various sized albums
    - For using in your Cricut, Cameo or E-Craft
    - For running through your Cuttlebug, Big Shot or Vagabond Machine
    Just remember that if you plan on using them with photos, you should cover them with acid-free, lignen-free paper first. This will keep your photos safe.

    Have a terrific week!

    Friday, October 19, 2012

    Fabulous Friday Find-Martha Stewart Craft Space Furniture

    Happy Friday Crafty Friends!

    Today's find is brought to you by Martha Stewart & it is her brand spanking new Craft Space Furniture.

    Check them out:


    Don't they look absolutely fantastic? That last table on the bottom in white is actually a collapsible craft table. Talk about a space saver!

    Prices range from $259 & up depending on the piece. Home Depot is carrying a selection of them online. I am not sure if they are in the brick & mortar stores just yet but boy oh boy!

    Yes, I realize this find is pricey but we can dream can't we?

    At least you will know it's out there and when you hit the lottery you can grab yourself a piece or two.

    Have a great weekend!

    Wednesday, October 17, 2012

    A Birthday Card

    Hello & thanks for stopping in today.

    Just wanted to share a birthday card I made for a special friend.


    After I photographed it I realized that I had 2 gold gems that would work perfectly on the clasp part of the card so I adhered them on but forgot to take another photo. It was the perfect finishing touch. I wish I would have taken another photo to show it because it made such a difference. Also, on the inside that is a pocket that could accommodate a gift card perfectly (or money, or a chocolate piece, or a tea bag).

    Oh well...hope you enjoyed it just the same.

    Tuesday, October 16, 2012

    TOOL TIME TUESDAY- The Cutterpillar Pro

    Hello All!

    Today's tool is the : CUTTERPILLAR PRO!

    It may very well be the last paper & photo trimmer you will need... so they say.
    The gear driven, rotary blade, LED backlight, large platform and lightweight construction are some of its' unique features. In addition, it has a drawer with a compartment built in for storage of cardstock, extra small tools, adhesive, etc...
    Want a peek?
    Okay, here goes:
    Don't you just love the look?
    Here's a little video for a closer look but keep in mind the price point may have changed as this video was released in 2011. Obviously, I am a little late in showcasing this gem of a tool but you know what they say...better late then never!                        

    UPDATE...Here's a video from a fellow crafter where does her review of the trimmer.


    You can head over to Cutterpillar.com to purchase yours if you are so inclined.

    As someone who is always on the lookout for a precise and effective paper & photo trimmer this one caught my eye. And after a little research, it may soon get a hold of my wallet too. I am making due with what I have but I am on the lookout for the next best one.

    Enjoy your day!


    Monday, October 15, 2012

    CRAFTING TIP OF THE WEEK# 153 - Strip Tease...

    Hello Crafters!

    I know, that post title seems a bit non-family friendly but I guarantee you that it is totally family friendly and especially craft family friendly!

    For this week's tip I thought I would share something I have been doing with my 12x12 paper.

    As many of you know, a lot of 12x12 card stock comes with a strip on the bottom which identifies the paper, the collection and the manufacturer.

    RECYCLE THOSE!
    When you use your paper trimmer to cut those off, keep those strips and use them on your layouts, cards and crafty projects.
    I have used mine when paper weaving.
    But here are a few more ideas for them:
    -As paper ribbons
    -To cut into smaller strips to make flower petals ( I made a flower that I placed on a card using strips that I cut and stamped on the plain side of the strip) .
    -As borders-use your punches along an edge of the strip for more interest
    -For journaling

    I am sure you can come up with more ways but the above are just a few of mine.

    Next time you're removing that "pesky" strip on your 12x12 paper, don't pitch it.
    Craft-cycle it!

    P.S. Remember my sympathy card from the Sept. 19th post? The flower on that card was made by craft-cycling  my strips. I cut them down about 2 inches after I stamped them and folded them in half, glued them at the ends, inked the edges and adhered them in a circular motion on a 3 inch circle.